Thursday, June 7, 2012

STEP 3: (or maybe 1!) Choosing or adapting designs for paper casting


Basically, there are a few "rules of thumb":
Simple, clean lines usually work best.
Things look smaller and farther apart in the casting - (make elements bolder/heavier and closer together than you might usually do on paper)
Sufficient depth is needed for the design to show up if viewed from any distance --narrow and deep molds can look good because they give good shadows, but they are difficult and labor-intensive to cast well.
a very popular casting, but do you want to spend several hours putting pulp into crevices with a toothpick?


There are several other things you might consider when choosing or working out a design for making a casting mold such as:
size, eventual use, difficulty (of cutting mold and of making a casting), legibility (this could mean "reading" or being able to see a design that's not lettering as well), as well as method of mold making (cutting vs.impressing or carving, etc.

Size:
Polymer clay molds can hold the tiniest details, but that doesn't mean they will be visible from a distance. If you are doing a card that will be held in the hand you can go small and detailed, but for wall art, you want to make sure it will not look like an empty frame hanging there. And very small things are not only hard to cut as a mold but are difficult to put pulp into when casting. However, you can successfully make impressed letters or designs very small -
When I teach beginning classes, I ask the students bring designs where the lettering (x-height) is not less than 1/2 inch high, preferably without hairlines or serifs. If you want it to be readable on a wall and easy to mold, you will need the clay layers about as thick as a matboard and your smallest design elements should be no smaller than that thickness.
Since the easiest method for transferring the design starts with a photocopy, make several in varying sizes so you can do some last-minutes adjusting, maybe even cutting and pasting elements from various sizes.

You will also have to consider the size of the oven. If you are being safe with a dedicated toaster oven, your mold does have to fit in it. Often an 8x10 tile fits well for baking on so this would be your maximum mold size including extra around the edges for making your lovely deckle, making the maximum design size more like 5x7".

these are samples I bring for beginning classes to try out their first mold
If you are going bigger, you can use baking sheets, cardboard, even masonite to bake molds on.
The height of the taller sides are the width of my oven, baked on masonite pieces

Use:
As mentioned above, you can go small if the item is something hand-held like a card or a book. You can make letter stamps from clay or do tiny writing by using the Clay Shaper to impress letters.You might be able to call attention to a wall piece with large letters or designs and have some smaller elements to discover as people come closer. Of course, the lighting where someone views it is going to make a big difference and you may or may not have control over that.
This one is easy to cast but harder to see,  I remade it in a smaller size to use as a card

Difficulty:
You will also want to consider how much time and effort you are willing to put into making castings. One of my most popular castings is also the hardest to cast (see second photo above), taking as long as three or four hours to make sure pulp is down in all the crevices and that colors are in the right places. This is not really a lot of fun and you are unlikely to sell them for enough money to make your time worthwhile (unless may you live in New York?). On the other hand, perhaps you only want to make one for yourself and many hours of work is not a problem.

Straight lines are good. Sometimes you can simplify just by cutting off serifs or other tiny details. Stencil designs are helpful to look at, they are usually bold and simple

As mentioned above, you will have trouble cutting if the width of the letter stroke (or design element) is less than the thickness of your clay layer. The simpler the design and the wider the area cut, the easier it will be to cast. Impressed letters, especially small ones, are fast and easy to cast.
This student project is very crisp and clear and will be fairly easy to cast. Below it is a test casting of small impressed lettering across the bottom - a small trial mold was made and baked and cast.
 Sometimes complications in the mold do not make it hard later, such as the multi-layered NOEL which was very tricky to figure out and cut, but is fairly easy to cast.
paper cast Noel from polymer clay mold
the planning for NOEL, second and third try


You can also make casting easier if you open up narrow areas by making it more of a wide "V" cut so the pulp can get in and out more easily. This can be done after the mold is baked and a test casting made,  by scraping gently with your x-acto.

Legibility:
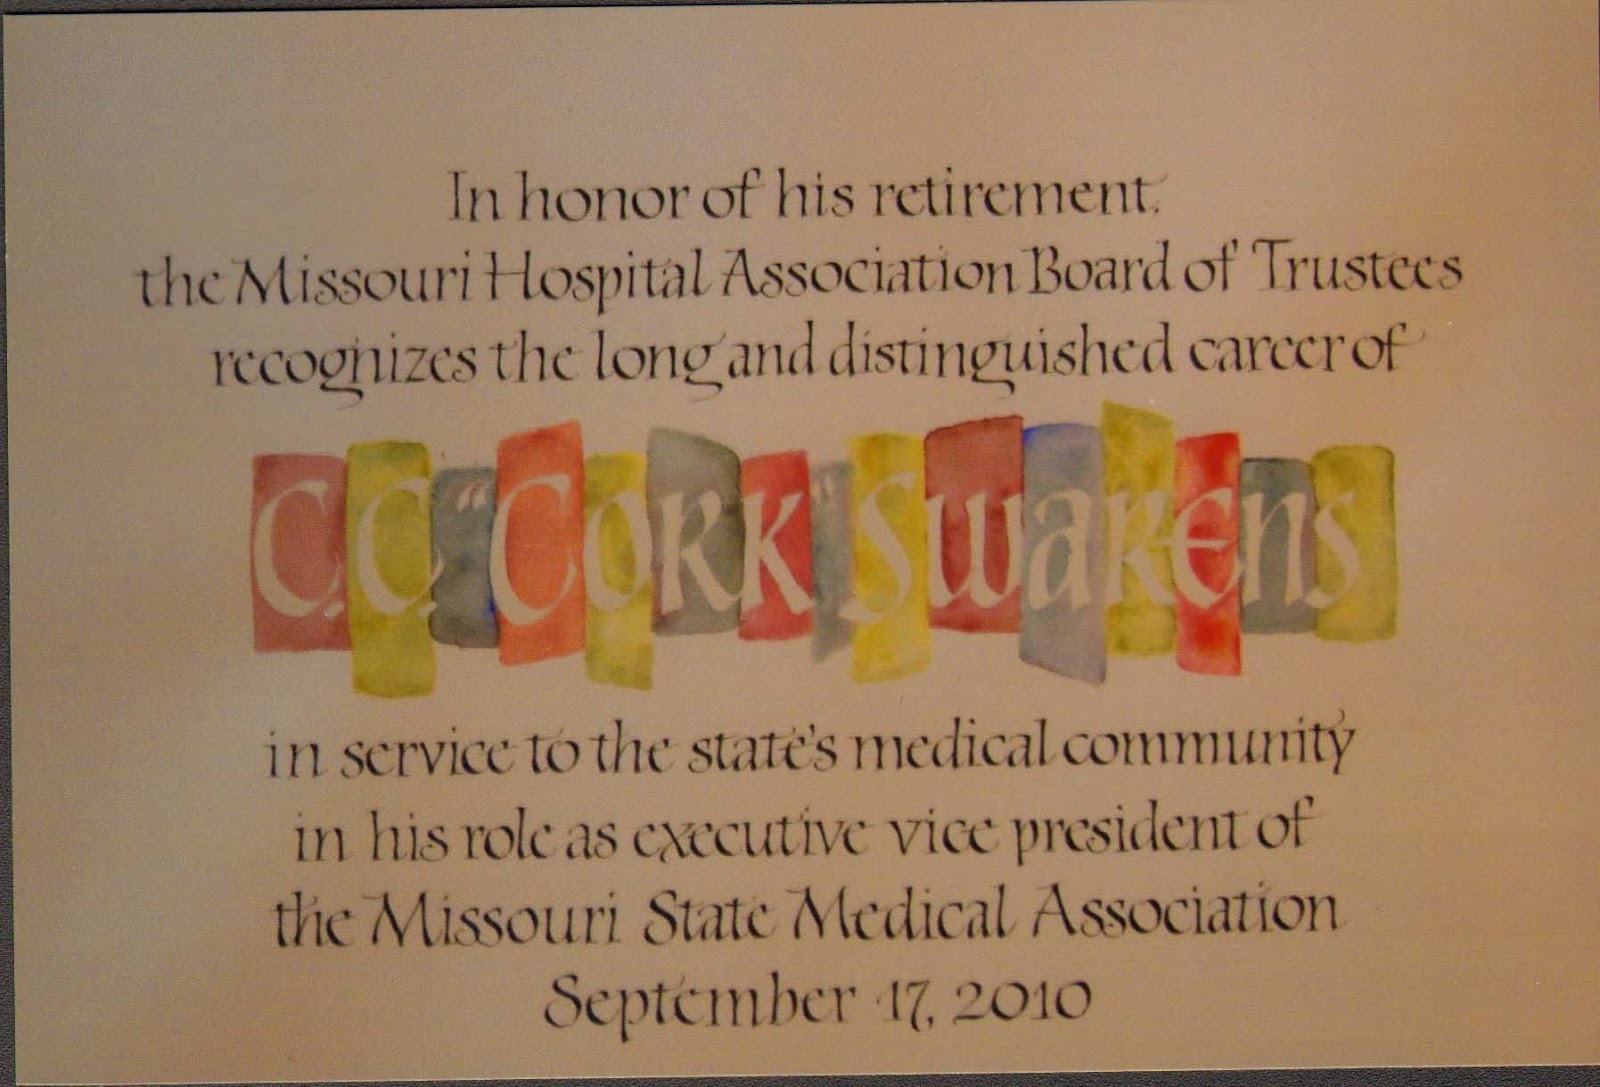
If no one can read the words or figure out the design it doesn't matter how well you cut the mold or cast it. It is the shadows that really show up, or the contrast between the highest white and the cast shadow. So some things can work with the letters going down and some won't. Here is an example of a design done two ways to see which would work best (lettering "up" or "down"):
Its even more obvious in person, but the one on the right is so much more legible! In both cases the backing layer was textured, which puts the texture on the top part of the casting.

And this is one that I never fixed or cast after the test because I was thinking that having "darkness" going down would make it darker but it was lighter because of less shadow. (If I were going to use this mold I would rub clay into the name at the bottom and bake a little and redo.)
you can learn from my mistakes!

Here's one where having the letters "going down" works just fine-
This is a tiny one, used as an ornament or on cards.
 Method:
Multiple layers make it possible to have smaller and larger lettering or more complicated designs (just keep adding "backing") - the "windows" one above that I didn't like has three layers of depth plus "added on" words for the ones that go down in the casting.
If you want to impress instead of cut, you can make your own alphabet stamps of Premo, bake them, and use talcum to make sure you can get them out of the soft clay when pushed in-
Paper Cast Book using alphabet stamps made from polymer clay

 these letters can still take some care to cast if you want them really clean and sharp.


Here's a mold with letters impressed with a coffee stirrer stick pushed down around the outside of the letters. These are very quick and easy to cast and dry quickly, good for making lots of cards
The design came from a Christmas card done previously - original in pencil

Baked or unbaked clay can be carved with carving tools.

A workshop participant in Salt Lake City combined cutting and linoleum and other tools
Of course, methods can be combined in one piece.

Last but not least, all designs will benefit from having a borderline around them. Make it tighter in than you would think. Even if you don't use it to cut a raised or lowered border, you will need it to help make your deckle edge symmetrical - or as a guide to change where you put your deckle if the test casting shows its too near or far.

So, once you have the design chosen and its size worked out, you can decide how to prepare your clay (allow extra space around the edges, make layers thin if you are going to cut through more than one), transfer your design, and cut your mold. and bake.

Congratulations! next comes making your test casting.

 Feel free to send design ideas for help and comment. (joan@letterdesignstudio.com)
and don't forget, I love to come and teach this in person- I'm better at explaining and problem-solving  in real life than I am at writing.


Saturday, May 26, 2012

STEP 5: Cutting your paper casting Mold, Backing and Baking

You should have your clay all rolled to a proper thickness, joined if necessary to make it big enough, with your design transferred onto the smoothest side of the clay -- Of course your clay is on waxed paper that is taped securely to a stiff piece of chipboard (like the backing of a good sketchbook). Healable cutting mats are not good because they feel about the same as clay when cutting so you don't feel the depth to cut to very well. And its handy to use the board under it throughout the process, plus you can size it just a little bigger than your clay to make it easier to move around.

You will need an X-acto type knife with a straight blade. A very helpful tool, well worth searching out, is a small "Clay Shaper" flat chisel tip size 0. If you are familiar with "Colour shapers" this is about the same but with a firmer black tip, make sure you get the tiny size 0 one.


hold the knife upright and vertical, with a slight angle for a V or valley cut

We will assume for this first project that you are going to want your letters (or shapes) raised in the casting, which means you will cut them out of the clay for the mold. Rule 2 of casting is "What goes DOWN in the mold goes UP in the casting" which sounds very basic but can really be confusing sometimes. (Rule 1 is "move waxed paper, not clay") Our brains aren't meant to run backwards and casting reverses everything. In fact, take a second to look at that design transferred onto your clay -- if reads forwards, you did it backwards! It should be in reverse (mirror image).

With your clay taped down (waxed paper masking-taped to cardboard), you are ready to start. Hold your knife vertically so you are using the point and have the blade up so only the narrowest part is in the clay - this makes it much easier to turn corners. You will want just a bit of a "V" cut so that the casting will come out of the mold. Think of the tip pointing toward the part of the design that will be removed. If you used acetone transfer it is easy to remember you want to cut away all the black.
cut away the black portions of the polymer clay

It is much easier to avoid "undercutting" (having the angle wrong so there is the opposite of a V) if you cut from the right-hand edge, turning the mold around as needed (unless you're a lefty, then reverse). Do not cut all the right sides and then turn, as the clay will start to heal itself. You can cut small pieces out as you go.
cut out the design with a slight "V" angle so the casting can come out
 If the clay is not cutting cleanly even if you have the knife vertical and move it along smoothly without chopping, you will find it helps immensely to chill the clay. You can simply put a freezer pack underneath the cardboard (helps to have the freezer pack on top of a folded or "scrumpled" towel to stabilize it). You can also put the whole thing in the freezer for a few minutes, but of course you will have to keep putting it back as it warms up.

For this mold, the clay outside the borderline will be cut away.

hold the x-acto fairly vertically and slant with the point towards the clay you are removing
Notice the tip is slanted toward the part being removed.
Cut from the outside of the lines so you are cutting away the line itself, since your slant will make things a bit smaller, and casting tends to make things look smaller and farther apart.

You are hoping to cut through the clay smoothly without cutting through the waxed paper - this can take a little practice so don't stress, but it will make it easier on complicated molds to make sure you get all the waxed paper off, as it will be in one piece.
If you have rough edges or tears at the corners, now is the time the Clay Shaper earns its keep - use it to gently smooth, to press bits back in place, etc. It's great to make it as smooth and neat as you can but after a while you can start to cause as many problems as you fix - most things are fixable later too, when the clay is baked and not likely to get fingernail marks, etc. from over-doing the fixing.
you want the flat chisel tip! size 0, the wooden one is the same tip plus a wire one and may be called a sculpting tool
using the Clay Shaper to hold small bits in place while removing waxed paper

When you are done cutting and smoothing, cover the whole thing with a clean piece of waxed paper, rubbing lightly to help it adhere (especially if you have small loose pieces of clay in your design). Cut away or loosen the tape, then place another cardboard on top and carefully flip it over. Remove the original cardboard and carefully peel every bit of waxed paper off your clay.
Now you can see your design "forwards" and see how you like it - don't worry too much if it seems off, this side will be against the background and little variations really won't show. If you really think you cut it wrong you can add waxed paper again and flip it back and recut.
 If you have unconnected pieces like the counters in letters, they will be extra secure if you can put just a tiny bit of Sculpey Diluent or Softener (I think its the same stuff, they've changed the name) - barely a drop on an old brush will do several spots.
Diluent or Softener - this bottle has lasted 11 years, it doesn't take much
there's enough in this drop for many spots to be wet enough so they will adhere better in the mold
 Adding the backing (OR second layer in a multiple layer piece)
 Your backing layer should be thicker - if you are using a pasta machine use the thickest setting - and it needs to be at least 3/4" bigger all around than the border of the first piece.
thicker backing layer ready to lay over flipped-over cut-out design - note everything was cut away outside of border

laying it down as centered as you can

After double-checking that there is no waxed paper anywhere on top of your design, you will take the thicker clay (on its waxed paper, of course) and carefully lay it over the design, (wax paper up-clay onto clay) keeping it as centered as you can. It helps if you can start from one side and press it on lightly to help keep from getting bubbles between the layers.
carefully adding a second  layer of polymer clay over the "forwards" design

 Rub lightly, especially if there are small pieces you want to make sure are sticking to the backing layer. Now slip cardboard under and carefully flip it back over, then remove the wax paper that is over the design.
slip cardboard under and flip it back over

remove waxed paper off top of design

The backing layer covers up the "forwards" design - so if you have a backing layer on and your design is not reversed, oops, you didn't flip it! if you are quick and it hasn't adhered you can probably carefully pull it off and do it right.You can use the clay shaper again to smooth and fix, especially small pieces that might need to be put back into position.
on this mold, the yellow is a second layer and another backing will be added after more cutting.

Trim it evenly, leaving plenty of space for your deckle to be made. If it follows the border line of the first piece it will be easier to tell where to make the edge of the casting. If you think you see air bubbles, stick with a pin and smooth over gently with finger. If the hole isn't wanting to disappear you can fill it or smooth it after baking - that's better than making dents from trying too hard.

Bake! a smooth ceramic tile(under $1 at Lowe's) is great for baking molds on, but not required - a cookie sheet, even the cardboard will work. Leave the waxed paper under it for now.
Premo bakes at 275 for 30 minutes for 1/4 inch thickness. You can hold a ruler to the edge to gauge thickness if you want. The small molds like the bird shown above or "joy" below need about 20-25 minutes. If your oven isn't overheated, longer will not hurt. If it comes out with bubbles, or warps, you can lay a tile on top (smooth side down of course)  to hold it flat while it cools and it will stay that way.
A finished mold. It would be much easier to cast with a nice, even edge if the backing layer had been cut wider and more evenly matched to the shape

Its best to use a dedicated oven, like a good quality toaster oven, since the fumes are definitely not healthy - at least use all the ventilation you can. Afterwords you can reheat the oven to a higher temp and then open and ventilate some more to make sure fumes are out and won't be in your food (I hope - if I die of polymer clay some day, will we even know?). Toaster ovens' thermostats can be pretty unreliable so you might invest in an oven thermometer.
That's it! it takes longer to describe than to make, really pretty simple. Just cut out the design being careful not to undercut, flip over to add a backing layer, trim and bake.

"Making the Casting" tutorial will be posted very soon.


Remember, for personal, live instruction and experienced problem-prevention, you can gather a group for a workshop 

Thursday, May 17, 2012

Silk Fusion is Fun (not to mention gorgeous)

Here are a few notes and photos from an all-day silk fusion workshop. It is in the process (like papercasting) of being made into an online course through the LinkedIn group FAMM (fiber and mixed media). They will be six-week courses with step-by-step lessons in a forum where you can post photos, ask questions, etc. Most likely I will post all the lessons at once so you can move faster if you like.
 Of course, I'm always happy to travel to teach, as well.
Silk Workshop in  Jefferson City MO

Meanwhile, here in Jefferson City, a great group of ladies managed to complete five different projects in a day. This let them experience various ways you can make and use silk fusion (it's like paper, and sort of like fabric, but technically not either one).
They made a sheet of it big enough to sew and embellish as a small purse (or for a wall hanging or other uses), and a sculpted bowl, two or three or four or five pins (brooches), a couple of ornaments (or earrings!), and put silk designs behind a glass plate. Whew! no wonder I'm worn out!

laying down fibers for silk fusion at the Art Bazaar
Here's a participant laying out silk fibers on nylon net to make a sculpted bowl.
After two or three layers, more netting or tulle is put on top.
making silk "paper" or fusion
The silk has to be wet down with soapy water to break the resistance to absorption
silk fusion being made in Jefferson City MO

Here's a shallow bowl nearly dry, she was looking to make it like wood and decided maybe the silk ended up more like leather, but we all loved it however you describe it.
silk fiber bowl
Here are a few of the pins
silk fusion pins drying
silk fusion pin being created

and a pin being created by "smooshing" the fiber "bat" into a mold.

Silk fusion can be sewn on, painted, cut and glued or sewn together, worn or hung on a wall or made into masks or flowers or pins or collars or cards..... I recommend the book "Take Silk" if you'd like to learn more. For other examples of fusion, like covered frames, mosiacs, etc, go to "fiberscribe"  gallery on the website.

I'm hoping some of the participants will share their finished products when everything dries and gets embellished with wires and beads and whatever else this creative group is likely to come up with.
If you feel you missed out, there will be another Art Bazaar silk fusion class in the fall, you can get on the list now to be notified when it gets closer.

For more frequent updates, you can "like" my facebook page http://tinyurl.com/LetterDesignStudio

Tuesday, May 15, 2012

tutorial on using resist for lettering (masking fluid)

I love writing with resist or "mask". It's the rubbery stuff that protects your paper (or primed canvas) from absorbing ink or paint and then rubs off. My hands-down favorite is Pebeo http://www.paperinkarts.com/pebm45.html  which I buy in the big (8 oz) bottle.

This writing is the paper showing through -- masking fluid was used in metal pens and then a background was done over it, several layers of watered-down color with plastic wrap texture, then the resist is rubbed off and viola - white lettering.
Many people have trouble with it because they use brushes and the liquid is very hard to manage plus it ruins the brushes, but masking fluid works great in metal pens. And it just peels off if it dries in the pen. You can make corrections so easily too - just let it dry and rub off the misspelling - or part you don't like, whether a whole page, a line, or one bit of a letter. You can go back in after it dries and retouch places  -- push in a rough edge with a fingernail or add a bit with a small pen to smooth something out.

First of all, you need to shake or stir your container of resist. Shaking makes bubbles but since I strain it anyway I haven't found that to be a big problem. I pour it through a piece of nylon stocking into a small container. Usually I will then add some distilled water from a dropper bottle. How much will depend on the size and type of your pen, you just need it to flow nicely and not "glob" too much. It's similar to making your gouache the right consistency, but I'd beware of making it too thin since I don't know when it might lose its covering power. If it looks even and shiny on the paper after it dries you're OK even if very little color shows.

If you have made penciled guidelines for your writing you may want to go in and lighten them with a kneaded eraser until they are just barely enough to see, because painting over them will seal them in and unless you are using dark colors they can show. You can't erase them after writing or you will pull off the resist - look closely at the example with the rainbow and you will see a few pencil lines that are there forever.
Tape your paper securely onto a board since you will be getting it wet for the background. A drawing board, piece of Masonite, foamcore in a pinch will do. Tape all around all edges with good quality masking tape. Doing this before lettering is safest as you might mess up the resist when smoothing down the paper.

It helps to have a scrap of your paper for trials to make sure your resist is the right consistency and you have the "hang" of writing with it. Sometimes you need to put more pressure on the pen than usual to get it started. Often you will find you need to wipe the back of the pen after dipping to keep it from blobbing. Keep at it, I have made it work even on canvas, and with nibs from pointed pen to half-inch wide, over other writing, etc.
It's critical that your pen nib be clean or any color may leach into the resist and stain your paper. Give it a good scrub with window cleaner and a toothbrush to be sure.
lettering with resist and a Mitchel #2 nib, too many pencil lines!

It still helps to have your paper at a slant, whether on a drafting table or slant board or a board in your lap resting on a table - try adjusting the angle if your resist isn't flowing well or if it's too fast and making blobs. Often a steeper angle than you usually use is helpful.
Clean your pen every now and then (may need to pull off dried resist or just give a quick scrub with a toothbrush over your water jar) and make sure you cover your container if left for a time.

Once your lettering is done, let it dry and look it over to see if you need any fixing as mentioned above. Now you get to do the fun part - coloring in the background.
You may have a picture or texture or color scheme in mind, or you might just want to play. You can use any paints or inks - gouache, acrylic inks, watercolor, etc. Don't be afraid to keep it a bit light as you can apply several layers of color for more control.
If you are a painter, just paint what you like. If you want something  abstract, you can go with the "saran wrap" method used for backgrounds. This entails wetting the paper and dropping in various colors then covering it all with crinkled plastic wrap. Most methods for coloring paper will work on top of the resist. I find it works best to water down your colors a bit before dropping them in. Sometimes you may want to lift the plastic wrap and re-apply to help even things out. The first layer dries fairly quickly and you can lift the wrap after a few minutes to let the lines soften up if you prefer.

To make sure your lettering will be clearly readable, you should aim to have the background dark enough that the pale blue of the resist looks lighter than the background. If the writing still looks darker than the colors around it you will not be able to read it. You can do more layers, add color up next to the letters or across lines of writing, etc.

When your background is to your satisfaction, remove the resist by rubbing with a rubber cement pick-up  (or your fingers!)http://www.dickblick.com/products/crepe-rubber-cement-pickup/
 You can see this one is going to need some more work for the letters in the yellow area to show up, it would have been much easier to add more color around them before taking off the resist.
In fact, after doing some fiddling, I overwrote the whole thing in resist again and added darker rainbow colors. If I had followed my own rule to color the background until the lettering in masking fluid was lighter than the background, I would have saved a lot of trouble. You can see where this piece ended up at rainbow

Here's a piece where the background was done first with acrylic inks and plastic wrap, and then written on with resist (using a fairly big "B" nib). Black was then used over all to make the colors glow through the letters.
background with writing done with masking fluid
Here's a rather poor photo (done before digital camera) showing the lettering after black was painted on and the resist rubbed off
original colors showing through letters protected by resist when laying a black background

On this certificate the name was done with masking fluid (resist) and a Speedball nib, then colored blocks painted over. It was a solution to doing the name without the quotation marks around the nickname showing up too much and looking out of place in a formal setting.

Here's a piece with all the lettering and borders done in Pebeo masking fluid using B nibs and ruling pen.
Pebeo masking fluid laid down for all lines and lettering

The second one shows the background added to look like the stained glass windows it was designed around and a bit of the stonework at the upper corners. Here's the finished piece:

The one below used resist to make a "dam" made by making a line of resist around a plate to give the "world" a clean edge when using the saran wrap method.
This one was done by lettering over a light saran wrap background and then more layers of the same technique darkened the background. Watercolor pencils were used to make clear where the lines of writing meet each other.

some of these are pretty old, so don't bother critiquing
Look closely at the top line of this "Proclamation" - it was done with a wide pen using resist and after the background color was put on and the resist rubbed off, the letters were written in with a narrower nib to give them a white outline. The lines between sections were done with a ruling pen with the corners rounded while wet, the writing with various Mitchel nibs, all done with masking fluid -- you need to dip the pen and then scrape it across your container or sometimes wipe the back lightly with a rag to keep the masking fluid from blobbing. Water it down more for smaller nibs.

Have fun! Using masking fluid for calligraphy has many possibilities and is very forgiving.

For workshops see: http://letterdesignstudio.com/

Saturday, May 12, 2012

The Old and The New, an update.

filling the narrow areas in a paper casting mold made from polymer clay
New - online classes being prepped, the first ever classes held at the local Art Bazaar off to a great start, and more tutorials almost ready to post (the class gave me a chance to get the photos I was missing - hard to take a picture of yourself cutting molds).
calligraphy in gouache and (I think - its been a while) sumi ink
And another 'aged" piece was discovered in the flat file, this one was finished, and originally was going to be part of a pair along with "Halfway Up the Stairs" which was done and sold years ago. I'm not sure why this one got put in the bottom of the drawer. Maybe I was just tired after trying many versions. I kind of like it, maybe it will rate a frame now.

New and Old? another diploma for my favorite Academy, they graduate the very best students! This diploma is mostly like the previous ones but hopefully tailored for the individual.
personalized calligraphy

 And I sold a piece I did not all that long ago, its a fairly large canvas.
calligraphy on canvas, acrylics and gouache and photo transfer

 I guess the fact that the house is my great-grandfather's and the little girl my grandmother should have clued me in that a relative might be interested :) And I've finally gotten connected to a good place in town to take professional photos and make reproductions, so they will be available.

AND I'm finally trying out writing on oil paints, seems to be workable so far,
oil paint blocked in
this is a view before it got blended a bit, next time you see it, there should be scriptures (think Living Water) all over it - hopefully - the master plan is to glaze and glaze so the writing seems in the water, could work......

Now if I could just get a maid and a cook I could get so much done! oh, a laundry lady would be nice too.