Every mold is going to have some imperfections - until you look at a casting you can't tell which ones matter. Sometimes dents or bumps in the mold do't show at all in the casting, sometimes they show a lot but are hard to find on the mold.
The most serious defects are those that keep the casting from coming out cleanly (or at all). You should take your test casting and hold it next to the mold to figure out what changes are needed. You may have to look closely to tell if a rough part of the casting was due to the mold or simply didn't have enough pulp in it. An Optivisor or reading glasses can be helpful.
Where a bit of pulp stuck, you may have packed it in too tightly or you may have roughness or undercutting that is grabbing the paper.
There are two main ways to fix; scraping away and adding clay.
If there are bumps or rough areas, you can gently and gradually scrape with the x-acto knife, being careful not to scratch up your smooth surfaces with the tip. If you have done some real undercutting, you may want to scrape away the top that overhangs, but more likely you will want to add in clay. Roll tiny snakes of softened clay, smash them down in with your clay shaper, smooth away the excess with the clay shaper or other ceramic tools. If you add clay you will need to bake again, but if it is tiny bits you may only need 5-120 minutes. You can keep test casting and improving, but making too many times can really add to air bubble bumps.
If there is part of the mold that you cut wrong or just don't like, it is possible to fill it in with clay and cut/impress anew - what tools depend on whether you are working the baked or unbaked parts. You can carve into baked clay but be careful, you can chip off pieces you didn't mean to. Liquid Sculpey can be used to fill in or smooth a lower part of a mold for major repair (like when you cut a part through too many layers in a multi-layered project)
If parts of the design are too tight or narrow and it was hard to get pulp in or out, you can open up shapes without changing the design much by gently scraping more of a "V" shape, widening the top but being careful not to cut into the bottom layer. You can also cut or scrape along edges to make your letters or pattern more even or more bold.
If pieces of the mold (counters in your letters usually) came off into the casting, you might have left waxed paper under them. This rarely happens if you make sure it is cleaned off and use some Sculpey diluent/softener under small pieces. Sometimes after long use things will break off. You can reattach - the best way I've found is using a tiny bit of superglue gel. You can use a bit of clay and rebake, use E6000 or jewelry glue, even a gluestick for temporary (one-time) fix.
Feel free to send me close-up photos and ask for advice in fixing problems in your mold.
It may be that you like it just fine-- after all, this is hand-made art, so as long as the casting comes out, you might not want to do anything else to it - and often practice in filling the mold is the best way to get a sharper casting.
Remember, I'd be happy to come teach you in person, we'd do several small projects to "get the hang of it" and learn various techniques, then prepare designs and do a larger, individualized project.

Showing posts with label calligraphic art process. Show all posts
Showing posts with label calligraphic art process. Show all posts
Thursday, April 23, 2020
Friday, June 21, 2013
keeping busy


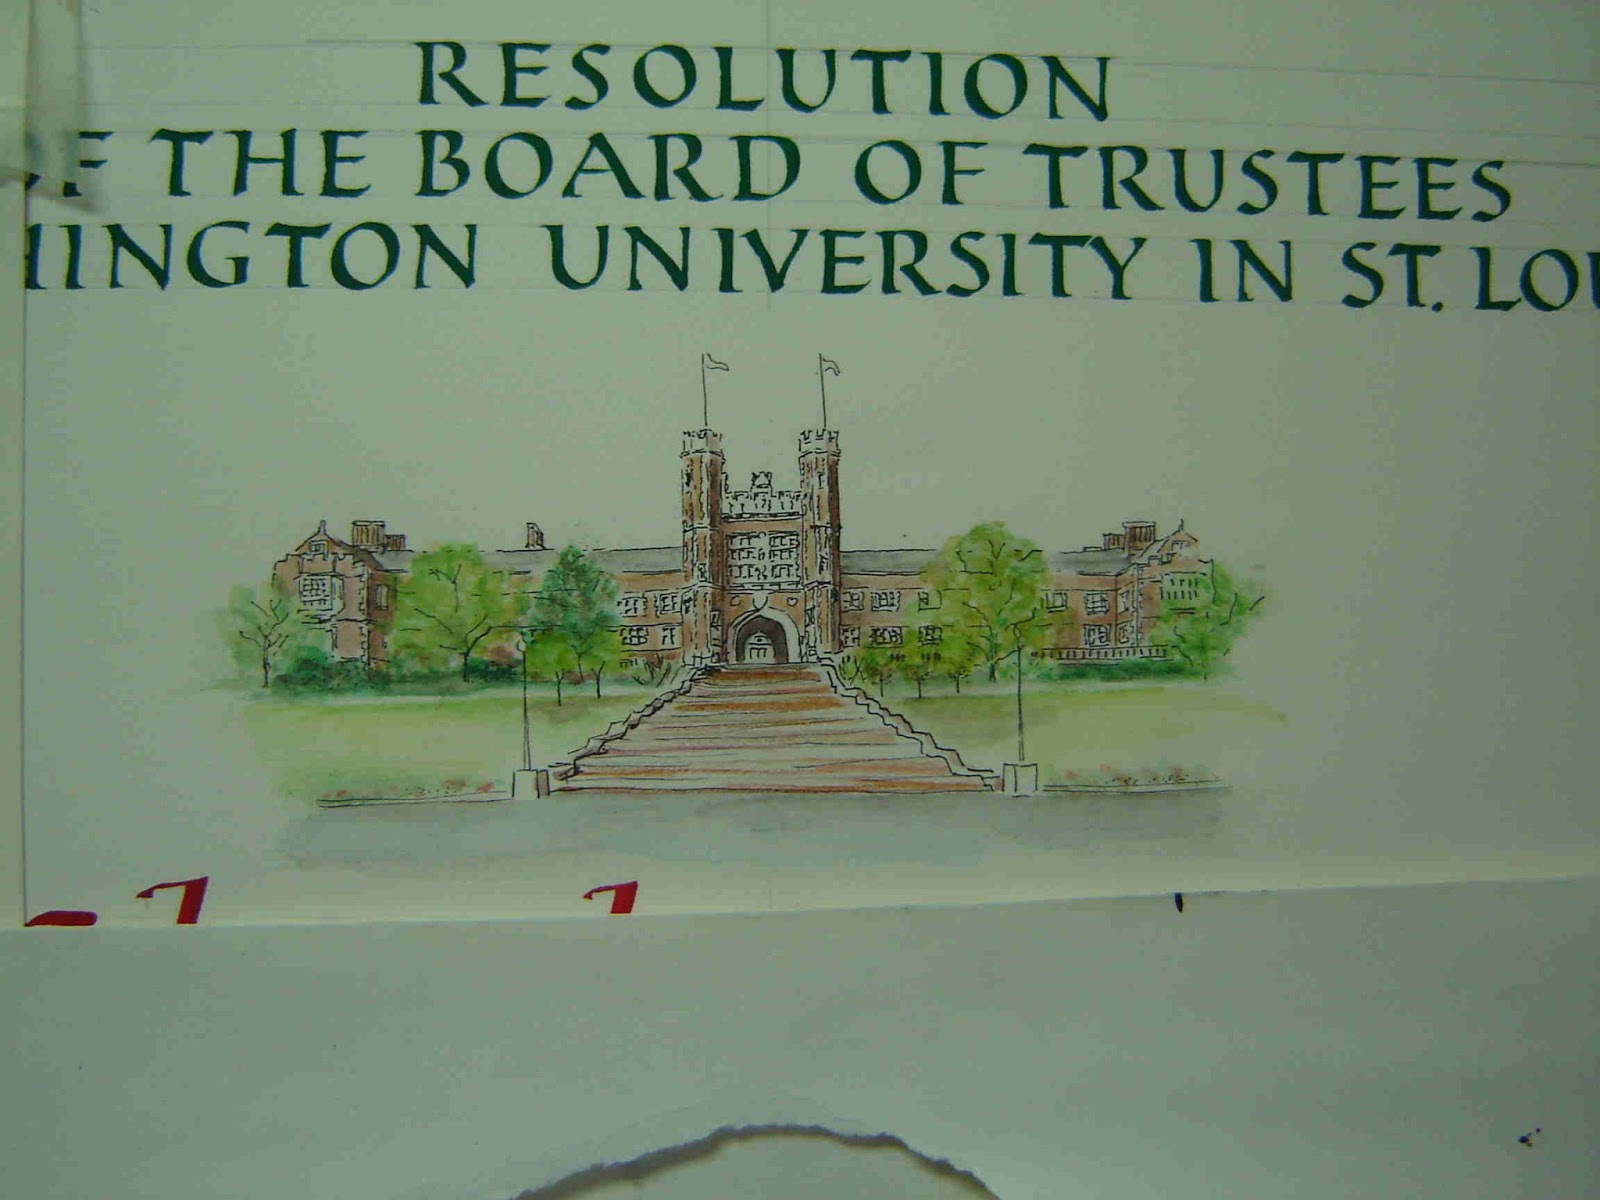
Doing the crest was tricky, thank you Patricia for hints.


I had a learning curve on the shipping - its the packaging that costs most, but UPS does a great job of getting things to St. Louis overnight with regular ground shipping.. And I recommend BareWalls framing in St. Genevieve! They pick-up and deliver in St. Louis and make everything smooth and easy.
Tuesday, October 2, 2012
Two Versions of a Favorite
Some of you are familiar with a print I did a few years ago that started out as a Mother's Day gift for women at our local church (giclee prints now for sale on Etsy, by the way:)

Some time later, I had a commission to do the same quote in two parts, so they could go on either side of a family photo, and to adapt it to the taste and decor of the client. I spent a lot of time trying different versions because the client is a good friend and I really wanted it to be "right". It's an interesting challenge to make things balance when the quote doesn't divide right in half and the words worth emphasizing are not evenly distributed either. Pretty sure I'm not the first calligrapher to want to rewrite something to better fit - the first family tree I did I really, really wanted to move a few kids to another family.
But I think it was successful in the end.

 You can see that some things are similar, like using capitals for emphasis and contrast, and fairly clean and simple letters. Both are written out in gouache on backgrounds done with "saran wrap" technique on watercolor paper. (Arches 90 lb. hot press)

Some time later, I had a commission to do the same quote in two parts, so they could go on either side of a family photo, and to adapt it to the taste and decor of the client. I spent a lot of time trying different versions because the client is a good friend and I really wanted it to be "right". It's an interesting challenge to make things balance when the quote doesn't divide right in half and the words worth emphasizing are not evenly distributed either. Pretty sure I'm not the first calligrapher to want to rewrite something to better fit - the first family tree I did I really, really wanted to move a few kids to another family.
But I think it was successful in the end.


Saturday, August 11, 2012
Wedding Painting

You see the signatures added on Robin's facebook page
And here's a closer look at the lettering, done with a clipped EF66 nib and acrylic gouache with a little acrylic black ink added to get it dark enough since I usually only have red, yellow and blue in acrylic gouache. Of course, to ensure the fairly "flush right" margin I had to do some extra layout and tracing work.

Here's an example of a Ketubah by a calligrapher I know, and a gallery-full by another . I have done a wedding certificate or two where all the guests sign it, such as for Quaker weddings.
Saturday, July 21, 2012
STEP 6: Making your PaperCasting


-planned your design (for your first try it could be something very small and simple)
-conditioned and rolled your clay (if your design is not small, there's also a post on joining strips of clay)
-transferred the design onto the clay
-cut, backed, and baked your mold
(if not, click on the links and go for it!)
Hooray! you are ready to make your test casting. There's a lot of detail here for those who really want a crisp, top-quality casting - you can just plop in some pulp and sponge the water out and see how it turns out if you aren't picky or want a rough look - but you won't be able to tell what defects you might have in the mold.
First you make some pulp. You will need a blender, a strainer, plastic tubs/bowls, cotton linter or paper, methycellulose optional. For filling your mold you will need flat toothpicks, clean flat sponge, thin terrycloth towel.This will not hurt your blender nor make it toxic. (Rinse or wash new sponges - sometimes the color bleeds)
I like to use cotton linters from Twinrocker but you can use other cotton linter, or cheap watercolor paper from a pad from the crafts store, or good paper scraps from your friendly print- or book-maker --- or just about any paper in a pinch but I really think you will be happier with something nice, like a good pure cotton. You will get good detail and no discoloration over time. You won't get a crisp result with paper towels, toilet paper, etc. I'd use copy paper quality at least.
Your first casting is your test casting to see how the mold works, so using pure white will make that easier - it helps you see detail.
Using additives is optional but I learned that I get the best results with a little methycellulose to help all elements of the casting adhere better. You must add it while the water is moving, using the hole in the lid of the blender. It takes less than half of a 1/4 tsp. measure for one blenderful of water. Some papermakers add a little PVA (white glue - teaspoon per blenderful maybe)
If you use sheets of cotton linter, you will need a piece a little larger than your casting mold. Don't worry about making too much as it's easy to save for another time.
Fill the blender with water, start it blending and gradually pour in a small amount of methycellulose if you have it. While it blends, put the lid on the methylcellulose jar and then put center plug back in the lid of the blender, and by then it will have blended enough.
Tear up the linter sheet into pieces about 1" and drop in. It takes a little experience to tell how much - probably not over about 6x7 inches total. If you are using paper instead of linter, it helps to let it soak a while. Blend until you feel it is pretty evenly soupy - maybe a minute. Pour into a strainer over a bowl or plastic container and shake around a bit until some of the water is out and it's a very wet lump. Dump into another container. You can put the water back in the blender and add more linter and blend again.

Set your mold in front of you, have some flat toothpicks (not round pointy ones), a clean flat sponge, and a fairly thin terry towel handy. Unless there are no narrow or deep parts to your mold, you will probably have to "toothpick" it to ensure a really crisp casting. This is done by taking a small blob of pulp and setting it near the part you are working on, teasing a little bit into a shape similar to the hole and putting it in. You can use fingernails for really tight bits, but mostly the toothpick works well to tamp it down in. Make sure you get pulp into all the corners and don't feel the hard clay of the mold when you push down with the toothpick. It takes a little practice but you can tell by feel and sometimes by look whether you have enough pulp in. You don't want it hard, just somewhat firm with no holes where the clay is not well covered. If your backing is colored, you shouldn't see the color through the pulp. Note: We are still filling only the holes or depressions in your mold. Sponge off excess water and push pulp all down in.
When you feel you have gotten all the depressions filled and sponged off to check, you will cover the whole mold with blobs of pulp. After initial "patting" down to make the blobs spread to cover it all, you should have it more than 1/4 inch thick all over.
You will need to gently slap it with the flat of your hand - you should hear "slap" and see some water flying. Think patting someone's cheek. Keep pushing it back in toward the middle from around the edges so it is within your borderlines or near your raised or lowered edging. You should slap it for some time until it becomes a cohesive sheet - you will tell a difference. Turn it so you are slapping from different directions. This takes a couple of minutes or so. If it just won't smooth out, you have gotten it too dry. All pulp put into or on the mold should be pretty wet. You should need to sponge up puddles underneath the mold now and then.

When you think it is smooth and cohesive, make sure it is all in close or within the edge you want, then make the "deckle" by using your fingertips to tap the outer edge until it is very thin, you should see the clay through it. If you see clay anywhere else though, add more wet pulp.
Check the evenness of your edges and then start sponging water out. Lay the sponge down and gently press, allow to come back up and suck out water. Squeeze it out into your container and move to a new spot. Now is the time your deckle "sets" so check it closely -- if you need to add pulp, make it very wet and pat into place. You can gently pull back if the pulp is too close or going off the edge.
When you are happy with your edge, continue sponging until you can't get much of any water out any more.

Now you "towel". Lay your towel on top of the pulp and press with fairly flat fingers all over your mold. Lift up, move to a dry part of towel and do it again.Now turn the mold, move the towel, and press more. Keep towel-pressing until it's hardly damp. You should be feeling depressions in the mold and see some of them and have a firm surface. If your fingers aren't tired you probably haven't done enough, especially if the mold is large.
If you are anxious to see it, lean the mold near moving air from a vent. I usually keep a stiff cardboard (or a tile) underneath as the clay will sag. A small fan is OK but often the edges will dry too fast and start to warp - you can put weight on the corners to help flatten while the rest dries. Do not try to take out your casting until it is quite thoroughly dry or the letters may stay in while the backing comes off!. I always allow at least overnight to dry unless there's a good reason to speed things up.
To remove the casting use something like a butterknife or letter opener to slip under the edges and work your way around and around, gently working it up.If it seems to stick, take your time, keep oging aroudn coaxing gently.. If bits do stay in the mold you can get them out with a pin and glue on with with PVA.
Other problems will be addressed in "Fixing and Refining Your Mold" to follow.
Feel free to send questions!
This is much easier to demo than to write about, you can get personal help and learn many variations on these basic techniques by having a workshop in your area.
Or, stay tuned for information about online classes where we will go step by step through several projects with feedback - not as fun as live workshops but it won't matter where you are, and there will be a "group" to experience it with.
Monday, July 16, 2012
an Anniversary Book

At any rate, our project was successful otherwise.
At our gathering (with the stealthy help of two nephews) I gave each of the seven siblings an unsewn signature with instructions to do whatever they wanted on the pages - that would be celebratory and have something about their family. We ended up with photos, notes, drawings, quite a variety. Another signature included a list of all the family members in order of birth (or marriage into the family)

One brother is a woodcarver and he made a wonderful box for the book to go in.

I used a binding method that is entirely undo-able if ever needed, but more importantly, that allows for any thickness of pages and will lie flat for easy viewing. (Learned at a workshop at the St. Louis Calligraphy Guild - I believe it was by Micheal Jacobs). My father is a geographer and made several trips to Guatemala so it was appropriate to use a map for the cover. Here's the title page- a piece of Guatemalan cloth wrapped the book inside the box.

Wednesday, July 11, 2012
experimenting with oil paint and calligraphy
 |
| lettering in and on water-soluble oil paint with venice turp glaze, canvas is 18x24 inches |
 |
| this was the blocked-in color, maybe I like it better than the finished piece. |
While I like the final result of my first try with oils, the lettering is not very good as the surface was not pleasant to work on nor the paint to control. I had originally wanted to try on a panel but didn't have one when I was ready to start.. So next I decided to try that (a wood panel) with acrylic gouache for the first layer and writing and use oil glazes over it. I figure since you can put oil paint over acrylic that should work, and allow the richness and enamel-like finish I was interested in.
So I got some small - just 6x8 inch - panels for experimenting. I coated this one with water absorbent ground and did a background painting with diluted acrylic guoache


At any rate, I don't know if the oil has enough barrier from the ground with the thin acrylic layer or if it will matter in the long run, but at least the basics worked. I have two more small panels and plan to continue experimenting and learning about the possibilities before trying another large piece.
Thursday, June 21, 2012
Updates on calligraphic works


Meanwhile I am still waiting for the glaze to dry on my first oil painting with calligraphy - I was going to add another layer of glaze but maybe this isn't the right kind to layer. It was interesting to be able to go back in and work in the wet glaze.

Thursday, June 7, 2012
STEP 3: (or maybe 1!) Choosing or adapting designs for paper casting

Basically, there are a few "rules of thumb":
Simple, clean lines usually work best.
Things look smaller and farther apart in the casting - (make elements bolder/heavier and closer together than you might usually do on paper)
Sufficient depth is needed for the design to show up if viewed from any distance --narrow and deep molds can look good because they give good shadows, but they are difficult and labor-intensive to cast well.
 |
| a very popular casting, but do you want to spend several hours putting pulp into crevices with a toothpick? |
There are several other things you might consider when choosing or working out a design for making a casting mold such as:
size, eventual use, difficulty (of cutting mold and of making a casting), legibility (this could mean "reading" or being able to see a design that's not lettering as well), as well as method of mold making (cutting vs.impressing or carving, etc.
Size:
Polymer clay molds can hold the tiniest details, but that doesn't mean they will be visible from a distance. If you are doing a card that will be held in the hand you can go small and detailed, but for wall art, you want to make sure it will not look like an empty frame hanging there. And very small things are not only hard to cut as a mold but are difficult to put pulp into when casting. However, you can successfully make impressed letters or designs very small -
When I teach beginning classes, I ask the students bring designs where the lettering (x-height) is not less than 1/2 inch high, preferably without hairlines or serifs. If you want it to be readable on a wall and easy to mold, you will need the clay layers about as thick as a matboard and your smallest design elements should be no smaller than that thickness.
Since the easiest method for transferring the design starts with a photocopy, make several in varying sizes so you can do some last-minutes adjusting, maybe even cutting and pasting elements from various sizes.
You will also have to consider the size of the oven. If you are being safe with a dedicated toaster oven, your mold does have to fit in it. Often an 8x10 tile fits well for baking on so this would be your maximum mold size including extra around the edges for making your lovely deckle, making the maximum design size more like 5x7".
 |
| these are samples I bring for beginning classes to try out their first mold |
 |
| The height of the taller sides are the width of my oven, baked on masonite pieces |
Use:
As mentioned above, you can go small if the item is something hand-held like a card or a book. You can make letter stamps from clay or do tiny writing by using the Clay Shaper to impress letters.You might be able to call attention to a wall piece with large letters or designs and have some smaller elements to discover as people come closer. Of course, the lighting where someone views it is going to make a big difference and you may or may not have control over that.
 |
| This one is easy to cast but harder to see, I remade it in a smaller size to use as a card |
Difficulty:
You will also want to consider how much time and effort you are willing to put into making castings. One of my most popular castings is also the hardest to cast (see second photo above), taking as long as three or four hours to make sure pulp is down in all the crevices and that colors are in the right places. This is not really a lot of fun and you are unlikely to sell them for enough money to make your time worthwhile (unless may you live in New York?). On the other hand, perhaps you only want to make one for yourself and many hours of work is not a problem.
Straight lines are good. Sometimes you can simplify just by cutting off serifs or other tiny details. Stencil designs are helpful to look at, they are usually bold and simple
As mentioned above, you will have trouble cutting if the width of the letter stroke (or design element) is less than the thickness of your clay layer. The simpler the design and the wider the area cut, the easier it will be to cast. Impressed letters, especially small ones, are fast and easy to cast.
 |
| This student project is very crisp and clear and will be fairly easy to cast. Below it is a test casting of small impressed lettering across the bottom - a small trial mold was made and baked and cast. |
 |
| paper cast Noel from polymer clay mold |
 |
| the planning for NOEL, second and third try |
You can also make casting easier if you open up narrow areas by making it more of a wide "V" cut so the pulp can get in and out more easily. This can be done after the mold is baked and a test casting made, by scraping gently with your x-acto.
Legibility:
If no one can read the words or figure out the design it doesn't matter how well you cut the mold or cast it. It is the shadows that really show up, or the contrast between the highest white and the cast shadow. So some things can work with the letters going down and some won't. Here is an example of a design done two ways to see which would work best (lettering "up" or "down"):
 |
| Its even more obvious in person, but the one on the right is so much more legible! In both cases the backing layer was textured, which puts the texture on the top part of the casting. |
And this is one that I never fixed or cast after the test because I was thinking that having "darkness" going down would make it darker but it was lighter because of less shadow. (If I were going to use this mold I would rub clay into the name at the bottom and bake a little and redo.)
 |
| you can learn from my mistakes! |
Here's one where having the letters "going down" works just fine-
|
| This is a tiny one, used as an ornament or on cards. |
Multiple layers make it possible to have smaller and larger lettering or more complicated designs (just keep adding "backing") - the "windows" one above that I didn't like has three layers of depth plus "added on" words for the ones that go down in the casting.
If you want to impress instead of cut, you can make your own alphabet stamps of Premo, bake them, and use talcum to make sure you can get them out of the soft clay when pushed in-
|
| Paper Cast Book using alphabet stamps made from polymer clay |
these letters can still take some care to cast if you want them really clean and sharp.


Baked or unbaked clay can be carved with carving tools.
 |
| A workshop participant in Salt Lake City combined cutting and linoleum and other tools |
Last but not least, all designs will benefit from having a borderline around them. Make it tighter in than you would think. Even if you don't use it to cut a raised or lowered border, you will need it to help make your deckle edge symmetrical - or as a guide to change where you put your deckle if the test casting shows its too near or far.
So, once you have the design chosen and its size worked out, you can decide how to prepare your clay (allow extra space around the edges, make layers thin if you are going to cut through more than one), transfer your design, and cut your mold. and bake.
Congratulations! next comes making your test casting.
Feel free to send design ideas for help and comment. (joan@letterdesignstudio.com)
and don't forget, I love to come and teach this in person- I'm better at explaining and problem-solving in real life than I am at writing.
Saturday, May 26, 2012
STEP 5: Cutting your paper casting Mold, Backing and Baking
You should have your clay all rolled to a proper thickness, joined if necessary to make it big enough, with your design transferred onto the smoothest side of the clay -- Of course your clay is on waxed paper that is taped securely to a stiff piece of chipboard (like the backing of a good sketchbook). Healable cutting mats are not good because they feel about the same as clay when cutting so you don't feel the depth to cut to very well. And its handy to use the board under it throughout the process, plus you can size it just a little bigger than your clay to make it easier to move around.
You will need an X-acto type knife with a straight blade. A very helpful tool, well worth searching out, is a small "Clay Shaper" flat chisel tip size 0. If you are familiar with "Colour shapers" this is about the same but with a firmer black tip, make sure you get the tiny size 0 one.
We will assume for this first project that you are going to want your letters (or shapes) raised in the casting, which means you will cut them out of the clay for the mold. Rule 2 of casting is "What goes DOWN in the mold goes UP in the casting" which sounds very basic but can really be confusing sometimes. (Rule 1 is "move waxed paper, not clay") Our brains aren't meant to run backwards and casting reverses everything. In fact, take a second to look at that design transferred onto your clay -- if reads forwards, you did it backwards! It should be in reverse (mirror image).
With your clay taped down (waxed paper masking-taped to cardboard), you are ready to start. Hold your knife vertically so you are using the point and have the blade up so only the narrowest part is in the clay - this makes it much easier to turn corners. You will want just a bit of a "V" cut so that the casting will come out of the mold. Think of the tip pointing toward the part of the design that will be removed. If you used acetone transfer it is easy to remember you want to cut away all the black.
It is much easier to avoid "undercutting" (having the angle wrong so there is the opposite of a V) if you cut from the right-hand edge, turning the mold around as needed (unless you're a lefty, then reverse). Do not cut all the right sides and then turn, as the clay will start to heal itself. You can cut small pieces out as you go.
If the clay is not cutting cleanly even if you have the knife vertical and move it along smoothly without chopping, you will find it helps immensely to chill the clay. You can simply put a freezer pack underneath the cardboard (helps to have the freezer pack on top of a folded or "scrumpled" towel to stabilize it). You can also put the whole thing in the freezer for a few minutes, but of course you will have to keep putting it back as it warms up.
For this mold, the clay outside the borderline will be cut away.
Notice the tip is slanted toward the part being removed.
Cut from the outside of the lines so you are cutting away the line itself, since your slant will make things a bit smaller, and casting tends to make things look smaller and farther apart.
You are hoping to cut through the clay smoothly without cutting through the waxed paper - this can take a little practice so don't stress, but it will make it easier on complicated molds to make sure you get all the waxed paper off, as it will be in one piece.
If you have rough edges or tears at the corners, now is the time the Clay Shaper earns its keep - use it to gently smooth, to press bits back in place, etc. It's great to make it as smooth and neat as you can but after a while you can start to cause as many problems as you fix - most things are fixable later too, when the clay is baked and not likely to get fingernail marks, etc. from over-doing the fixing.
When you are done cutting and smoothing, cover the whole thing with a clean piece of waxed paper, rubbing lightly to help it adhere (especially if you have small loose pieces of clay in your design). Cut away or loosen the tape, then place another cardboard on top and carefully flip it over. Remove the original cardboard and carefully peel every bit of waxed paper off your clay.
Now you can see your design "forwards" and see how you like it - don't worry too much if it seems off, this side will be against the background and little variations really won't show. If you really think you cut it wrong you can add waxed paper again and flip it back and recut.
If you have unconnected pieces like the counters in letters, they will be extra secure if you can put just a tiny bit of Sculpey Diluent or Softener (I think its the same stuff, they've changed the name) - barely a drop on an old brush will do several spots.
Adding the backing (OR second layer in a multiple layer piece)
Your backing layer should be thicker - if you are using a pasta machine use the thickest setting - and it needs to be at least 3/4" bigger all around than the border of the first piece.
After double-checking that there is no waxed paper anywhere on top of your design, you will take the thicker clay (on its waxed paper, of course) and carefully lay it over the design, (wax paper up-clay onto clay) keeping it as centered as you can. It helps if you can start from one side and press it on lightly to help keep from getting bubbles between the layers.
Rub lightly, especially if there are small pieces you want to make sure are sticking to the backing layer. Now slip cardboard under and carefully flip it back over, then remove the wax paper that is over the design.
The backing layer covers up the "forwards" design - so if you have a backing layer on and your design is not reversed, oops, you didn't flip it! if you are quick and it hasn't adhered you can probably carefully pull it off and do it right.You can use the clay shaper again to smooth and fix, especially small pieces that might need to be put back into position.
Trim it evenly, leaving plenty of space for your deckle to be made. If it follows the border line of the first piece it will be easier to tell where to make the edge of the casting. If you think you see air bubbles, stick with a pin and smooth over gently with finger. If the hole isn't wanting to disappear you can fill it or smooth it after baking - that's better than making dents from trying too hard.
Bake! a smooth ceramic tile(under $1 at Lowe's) is great for baking molds on, but not required - a cookie sheet, even the cardboard will work. Leave the waxed paper under it for now.
Premo bakes at 275 for 30 minutes for 1/4 inch thickness. You can hold a ruler to the edge to gauge thickness if you want. The small molds like the bird shown above or "joy" below need about 20-25 minutes. If your oven isn't overheated, longer will not hurt. If it comes out with bubbles, or warps, you can lay a tile on top (smooth side down of course) to hold it flat while it cools and it will stay that way.
Its best to use a dedicated oven, like a good quality toaster oven, since the fumes are definitely not healthy - at least use all the ventilation you can. Afterwords you can reheat the oven to a higher temp and then open and ventilate some more to make sure fumes are out and won't be in your food (I hope - if I die of polymer clay some day, will we even know?). Toaster ovens' thermostats can be pretty unreliable so you might invest in an oven thermometer.
That's it! it takes longer to describe than to make, really pretty simple. Just cut out the design being careful not to undercut, flip over to add a backing layer, trim and bake.
"Making the Casting" tutorial will be posted very soon.
Remember, for personal, live instruction and experienced problem-prevention, you can gather a group for a workshop
You will need an X-acto type knife with a straight blade. A very helpful tool, well worth searching out, is a small "Clay Shaper" flat chisel tip size 0. If you are familiar with "Colour shapers" this is about the same but with a firmer black tip, make sure you get the tiny size 0 one.
 |
| hold the knife upright and vertical, with a slight angle for a V or valley cut |
We will assume for this first project that you are going to want your letters (or shapes) raised in the casting, which means you will cut them out of the clay for the mold. Rule 2 of casting is "What goes DOWN in the mold goes UP in the casting" which sounds very basic but can really be confusing sometimes. (Rule 1 is "move waxed paper, not clay") Our brains aren't meant to run backwards and casting reverses everything. In fact, take a second to look at that design transferred onto your clay -- if reads forwards, you did it backwards! It should be in reverse (mirror image).
With your clay taped down (waxed paper masking-taped to cardboard), you are ready to start. Hold your knife vertically so you are using the point and have the blade up so only the narrowest part is in the clay - this makes it much easier to turn corners. You will want just a bit of a "V" cut so that the casting will come out of the mold. Think of the tip pointing toward the part of the design that will be removed. If you used acetone transfer it is easy to remember you want to cut away all the black.
 |
| cut away the black portions of the polymer clay |
It is much easier to avoid "undercutting" (having the angle wrong so there is the opposite of a V) if you cut from the right-hand edge, turning the mold around as needed (unless you're a lefty, then reverse). Do not cut all the right sides and then turn, as the clay will start to heal itself. You can cut small pieces out as you go.
 |
| cut out the design with a slight "V" angle so the casting can come out |
For this mold, the clay outside the borderline will be cut away.
 |
| hold the x-acto fairly vertically and slant with the point towards the clay you are removing |
Cut from the outside of the lines so you are cutting away the line itself, since your slant will make things a bit smaller, and casting tends to make things look smaller and farther apart.
You are hoping to cut through the clay smoothly without cutting through the waxed paper - this can take a little practice so don't stress, but it will make it easier on complicated molds to make sure you get all the waxed paper off, as it will be in one piece.
If you have rough edges or tears at the corners, now is the time the Clay Shaper earns its keep - use it to gently smooth, to press bits back in place, etc. It's great to make it as smooth and neat as you can but after a while you can start to cause as many problems as you fix - most things are fixable later too, when the clay is baked and not likely to get fingernail marks, etc. from over-doing the fixing.
 |
| you want the flat chisel tip! size 0, the wooden one is the same tip plus a wire one and may be called a sculpting tool |
 |
| using the Clay Shaper to hold small bits in place while removing waxed paper |
When you are done cutting and smoothing, cover the whole thing with a clean piece of waxed paper, rubbing lightly to help it adhere (especially if you have small loose pieces of clay in your design). Cut away or loosen the tape, then place another cardboard on top and carefully flip it over. Remove the original cardboard and carefully peel every bit of waxed paper off your clay.
Now you can see your design "forwards" and see how you like it - don't worry too much if it seems off, this side will be against the background and little variations really won't show. If you really think you cut it wrong you can add waxed paper again and flip it back and recut.
If you have unconnected pieces like the counters in letters, they will be extra secure if you can put just a tiny bit of Sculpey Diluent or Softener (I think its the same stuff, they've changed the name) - barely a drop on an old brush will do several spots.
 |
| Diluent or Softener - this bottle has lasted 11 years, it doesn't take much |
 |
| there's enough in this drop for many spots to be wet enough so they will adhere better in the mold |
Your backing layer should be thicker - if you are using a pasta machine use the thickest setting - and it needs to be at least 3/4" bigger all around than the border of the first piece.
 |
| thicker backing layer ready to lay over flipped-over cut-out design - note everything was cut away outside of border |
 |
| laying it down as centered as you can |
After double-checking that there is no waxed paper anywhere on top of your design, you will take the thicker clay (on its waxed paper, of course) and carefully lay it over the design, (wax paper up-clay onto clay) keeping it as centered as you can. It helps if you can start from one side and press it on lightly to help keep from getting bubbles between the layers.
 |
| carefully adding a second layer of polymer clay over the "forwards" design |
Rub lightly, especially if there are small pieces you want to make sure are sticking to the backing layer. Now slip cardboard under and carefully flip it back over, then remove the wax paper that is over the design.
 |
| slip cardboard under and flip it back over |
 |
| remove waxed paper off top of design |
The backing layer covers up the "forwards" design - so if you have a backing layer on and your design is not reversed, oops, you didn't flip it! if you are quick and it hasn't adhered you can probably carefully pull it off and do it right.You can use the clay shaper again to smooth and fix, especially small pieces that might need to be put back into position.
 |
| on this mold, the yellow is a second layer and another backing will be added after more cutting. |
Trim it evenly, leaving plenty of space for your deckle to be made. If it follows the border line of the first piece it will be easier to tell where to make the edge of the casting. If you think you see air bubbles, stick with a pin and smooth over gently with finger. If the hole isn't wanting to disappear you can fill it or smooth it after baking - that's better than making dents from trying too hard.
Bake! a smooth ceramic tile(under $1 at Lowe's) is great for baking molds on, but not required - a cookie sheet, even the cardboard will work. Leave the waxed paper under it for now.
Premo bakes at 275 for 30 minutes for 1/4 inch thickness. You can hold a ruler to the edge to gauge thickness if you want. The small molds like the bird shown above or "joy" below need about 20-25 minutes. If your oven isn't overheated, longer will not hurt. If it comes out with bubbles, or warps, you can lay a tile on top (smooth side down of course) to hold it flat while it cools and it will stay that way.
 |
| A finished mold. It would be much easier to cast with a nice, even edge if the backing layer had been cut wider and more evenly matched to the shape |
Its best to use a dedicated oven, like a good quality toaster oven, since the fumes are definitely not healthy - at least use all the ventilation you can. Afterwords you can reheat the oven to a higher temp and then open and ventilate some more to make sure fumes are out and won't be in your food (I hope - if I die of polymer clay some day, will we even know?). Toaster ovens' thermostats can be pretty unreliable so you might invest in an oven thermometer.
That's it! it takes longer to describe than to make, really pretty simple. Just cut out the design being careful not to undercut, flip over to add a backing layer, trim and bake.
"Making the Casting" tutorial will be posted very soon.
Remember, for personal, live instruction and experienced problem-prevention, you can gather a group for a workshop
Subscribe to:
Posts (Atom)